RECIPE: Cozy Up With A Slice Of This Delicious Winnie The Pooh Cake
For those feeling a bit rumbly in your tumbly this Thursday morning, we’ve got a Winnie The Pooh inspired recipe that you’ll definitely want to cozy up to! You’ll have to stop yourself from having more than just a smackerel of this delectable dessert!
Luckily, with this easy-to-make recipe you can recreate your Hundred Acre Wood masterpiece time and time again.
Winnie the Pooh Cake
INGREDIENTS:
- Your favorite cake recipe
- Two small round cake pans
- White frosting
- Yellow food dye
- Multicolored sprinkles
- Black and brown decorative icing
- Wax paper
- Scissors
- Pencil
- Tweezers
DIRECTIONS:
- Preheat your oven and prepare your batter according to your favorite cake recipe. Pour the batter into two greased, round cake pans. Carefully place in the oven to bake.
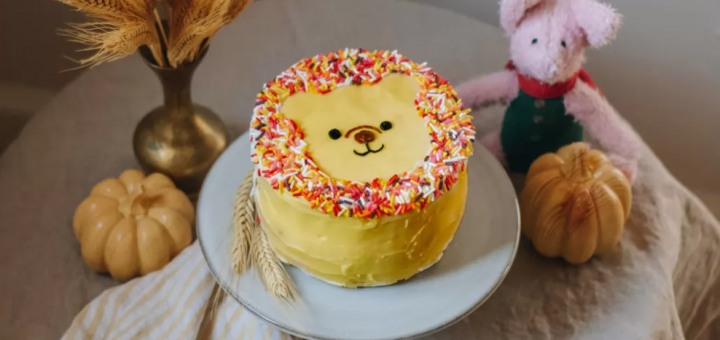
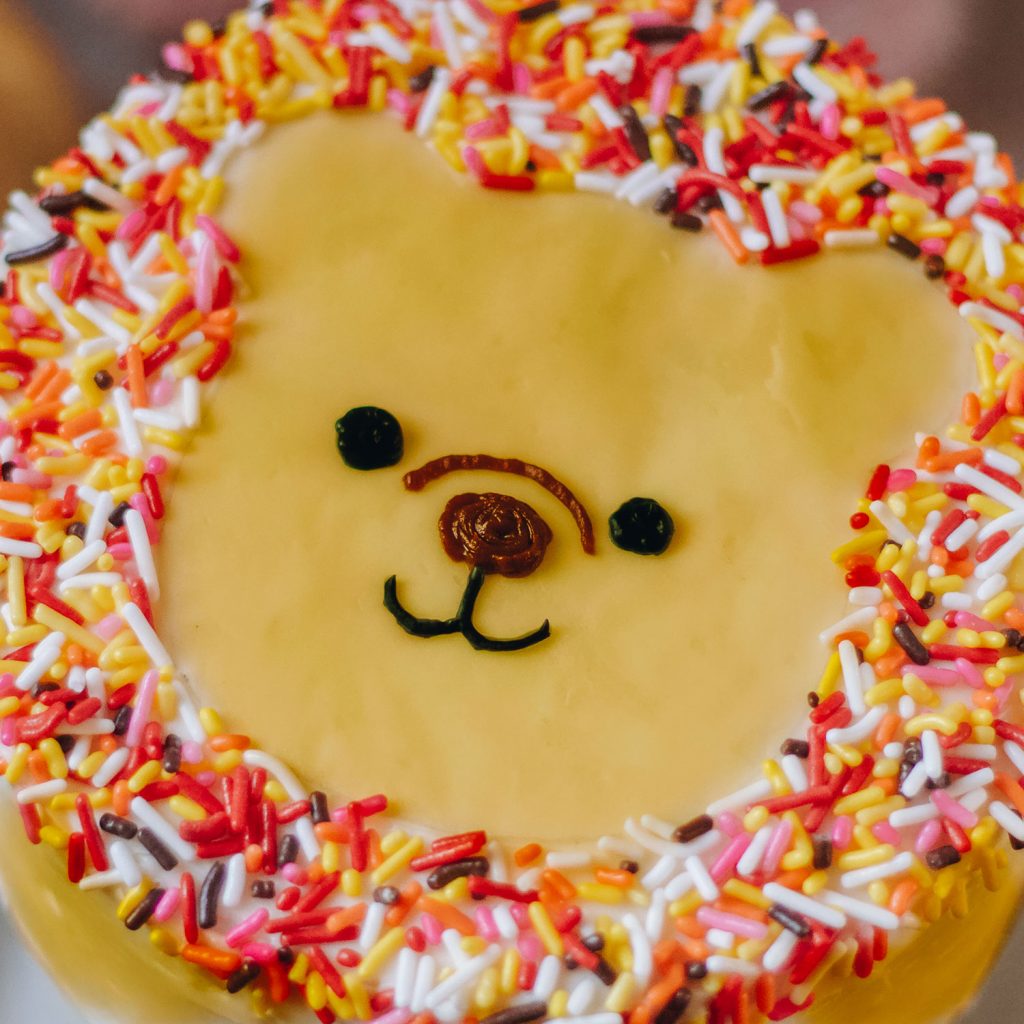
- While your cakes are baking, sketch out a Winnie the Pooh face shape onto wax paper and cut it out. It should be about 2-inch smaller than your cake pans. We used 6-inch pans, so I made my Winnie the Pooh about 4-inch tall. Set aside.
- Remove the cakes from the oven. Let them cool completely before removing them from the pans.
- After cooling, gently remove the cakes from the pans and place them on a flat surface or plate. Using a bread knife, cut off the rounded tops of the cakes so they are flat on top.
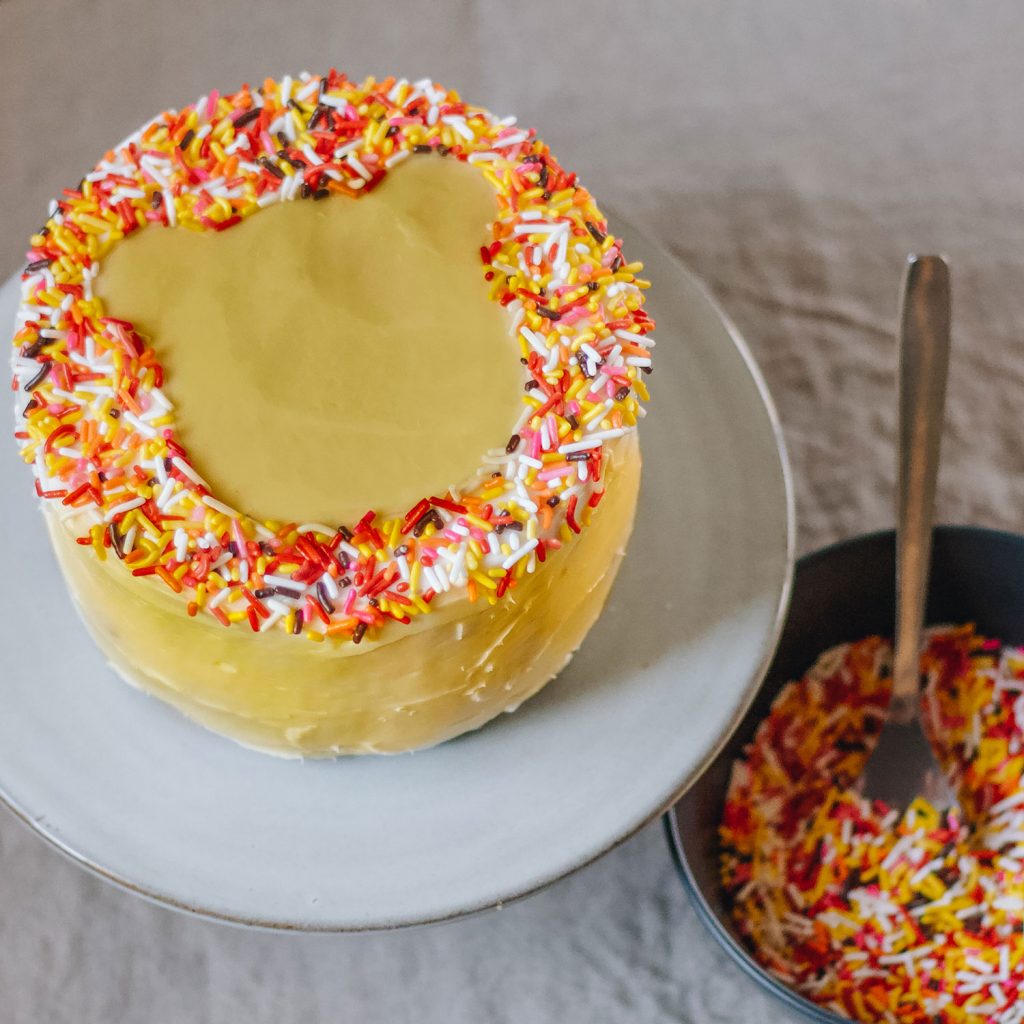
- Place the first cake layer on your cake stand, and frost the top; then place the second cake layer on top and frost all over to create a crumb coat. Place the cakes in the fridge for a few minutes before adding the rest of the frosting. This will help keep the frosting firm and make it easier to get a nice smooth finish and full coverage.
- Mix drops of yellow food dye with the rest of your white frosting. Start with only one or two drops for a light pastel color, and add more as desired. Generously frost over the white crumb coat.
- Place your wax paper Winnie the Pooh template on top of the cake. Press the template lightly to make sure it’s nice and smooth.
- Use a spoon to distribute the sprinkles all over the cake, especially around the edges. Gently dust off extra sprinkles from the wax paper template, then very carefully use tweezers to remove the template. Use a spoon or knife to smooth out any frosting that’s affected by this process.
- Pipe Winnie the Pooh’s nose with brown icing. Use the black icing for his mouth and eyes.
- Serve and enjoy!

Once your cake is complete then we can’t think of a better way to celebrate than having a spot of tea, a slice of your decadent creation and curling up to watch the film Christopher Robin now on DIsney+ In this heartwarming tale from Disney, Christopher Robin, the boy who had countless adventures in the Hundred Acre Wood, has grown up and lost his way. Now it’s up to his spirited and loveable stuffed animals, Winnie The Pooh, Tigger, Piglet, and the rest of the gang, to rekindle their friendship and remind him of endless days of childlike wonder and make-believe, when doing nothing was the very best something.
Readers are also encouraged to keep following along with MickeyBlog for more awesome Disney-inspired recipes.
Thinking about a Disney Getaway? Getting started is easy! Simply fill out our form below to get your FREE, no-obligation quote from MickeyTravels.
Find articles like this helpful? Then why not consider working with an Authorized Disney Vacation Planner? As an agent with MickeyTravels, I’ll be on hand to assist you with everything from finding your perfect package to helping you plan lots of special touches to make your visit truly magical. Best of all my services are absolutely FREE. Get in touch at 1.800.801.4025 via email at mroden@mickeytravels.com or follow along on Facebook