How To Create Magic By Tapping Your iPhone With Your MagicBand
We all know and love the amazing features of our MagicBands. It opens our Disney Resort Hotel doors, serves as our Park admission, and can even be used as a payment method while enjoying our Disney vacations. But did you know that you can also use it with you iPhone? Today I’m going to walk you through the steps to have your iPhone perform special tasks every time you tap your MagicBand to it.
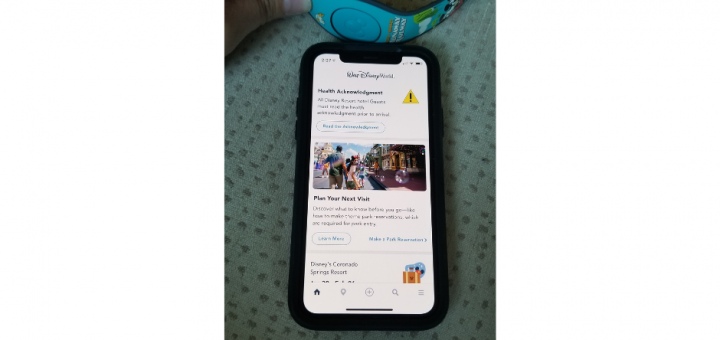
Currently I have my iPhone set up to launch the My Disney Experience app when my MagicBand is tapped. Here’s a peek:
First, let’s start off this discussion with a little bit of background. Inside each MagicBand is a near field communication (NFC) tag. These tags don’t require a power source and store small amounts of data. When a NFC reader gets close enough to a tag (maximum range of about 4 inches), it energizes it and transfers the data from that tag. If you have an iPhone 7 or later (with iOS 14 or later) then your device comes equipped with a NFC reader! The good news is that iOS 14 and later versions support background reading of NFC, so you don’t have to worry about enabling anything. It’s already running in the background.
I’m going to walk you through how to set up your iPhone to open your My Disney Experience app when tapped by your MagicBand. Once you have the basics down then the possibilities are endless to what your MagicBand can do!
Step 1:
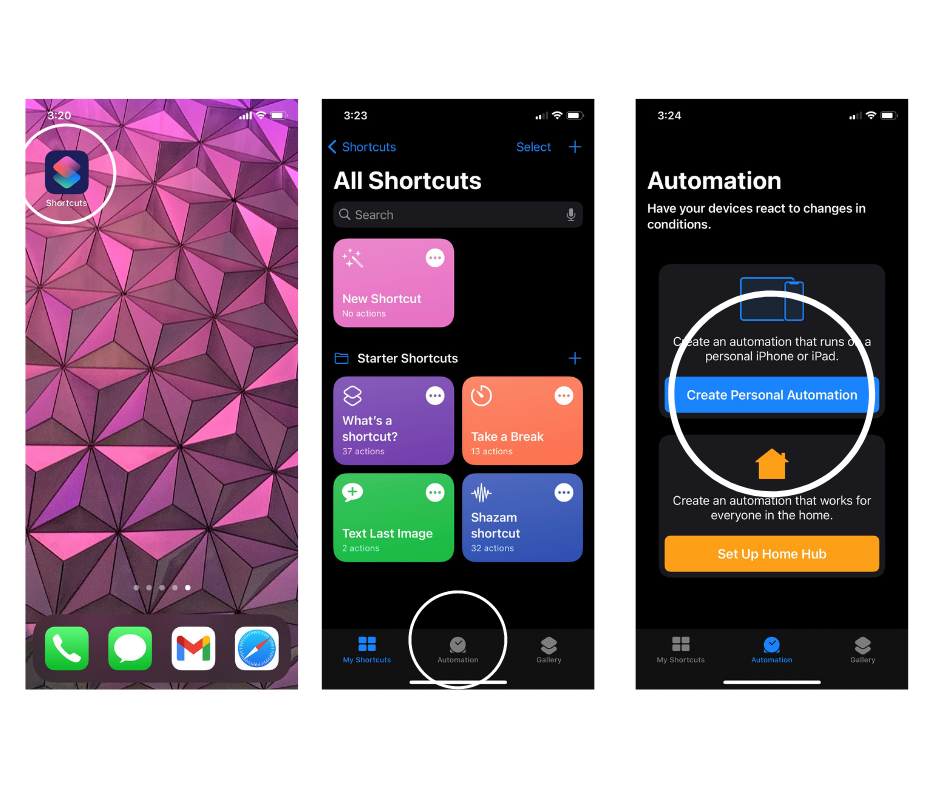

To begin we are heading over to the Shortcuts app that comes standard with your iPhone. Click on the app and then select “Automation” in the center of the bottom menu. Next, you’ll want to to choose “Create Personal Automation”.
Step 2:
Then you’ll want to scroll down to find and select the “NFC” option. Once that opens, the app asks for you to Scan for the NFC tag that you want to use as your “trigger”. The short video clip above shows the MagicBand scanning process including where to hold it so the iPhone can read it.
Step 3:
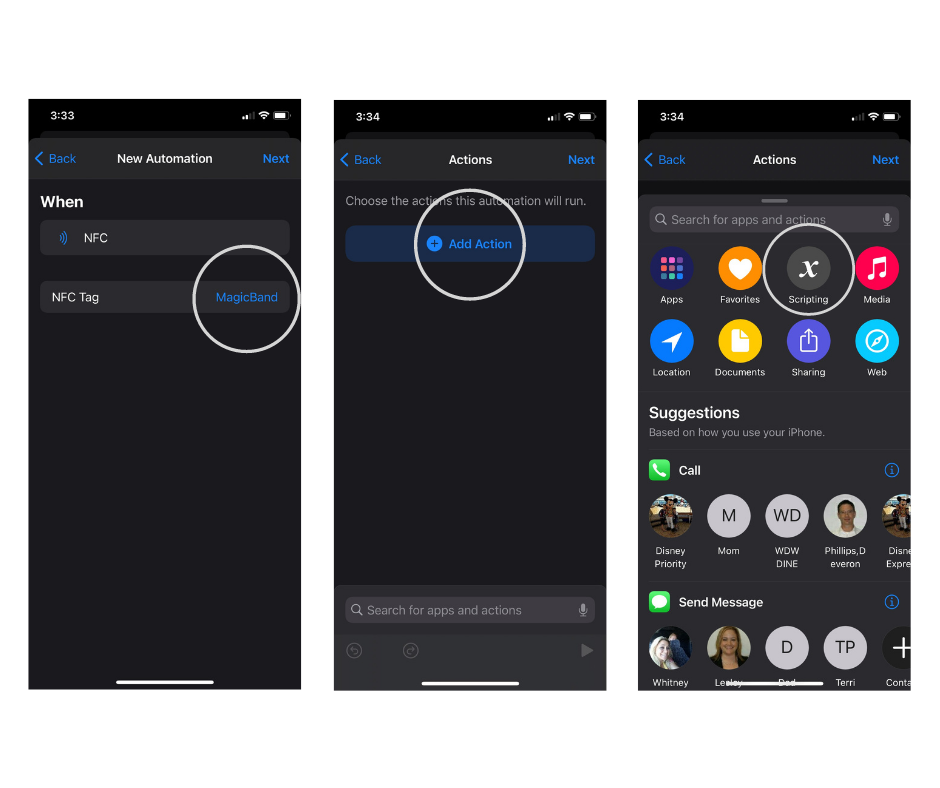

Once the MagicBand NFC tag is detected you are then asked to name it. You can see in the example above that I named mine “MagicBand”. Not very creative I know but it’s a good time to point out that each MagicBand has a unique NFC Tag. This means that you can program each of your MagicBands to do something unique. For that reason I actually recommend naming the NFC Tag with a unique name to that specific MagicBand design (i.e. Runaway Railway MagicBand). After your MagicBand NFC tag has a name click “Next” in the upper right hand corner of the screen.
Now we are going to tell the iPhone what we want it to do whenever the MagicBand is tapped. On the next screen select “Add Action” and from there we choose “Scripting”.
Step 4:
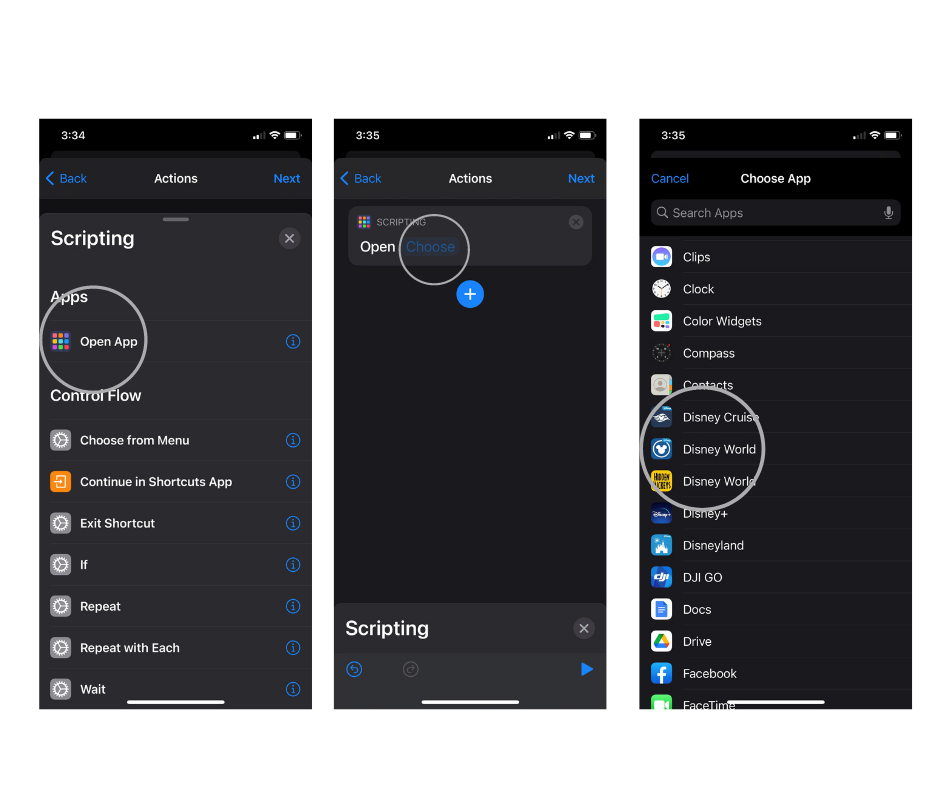
Click “Open App” and you’ll see the words “Open Choose”. Click on the word “Choose” and a list of available apps will display. For this example, scroll down and select “Disney World” for your My Disney Experience app to be activated.
Step 5:
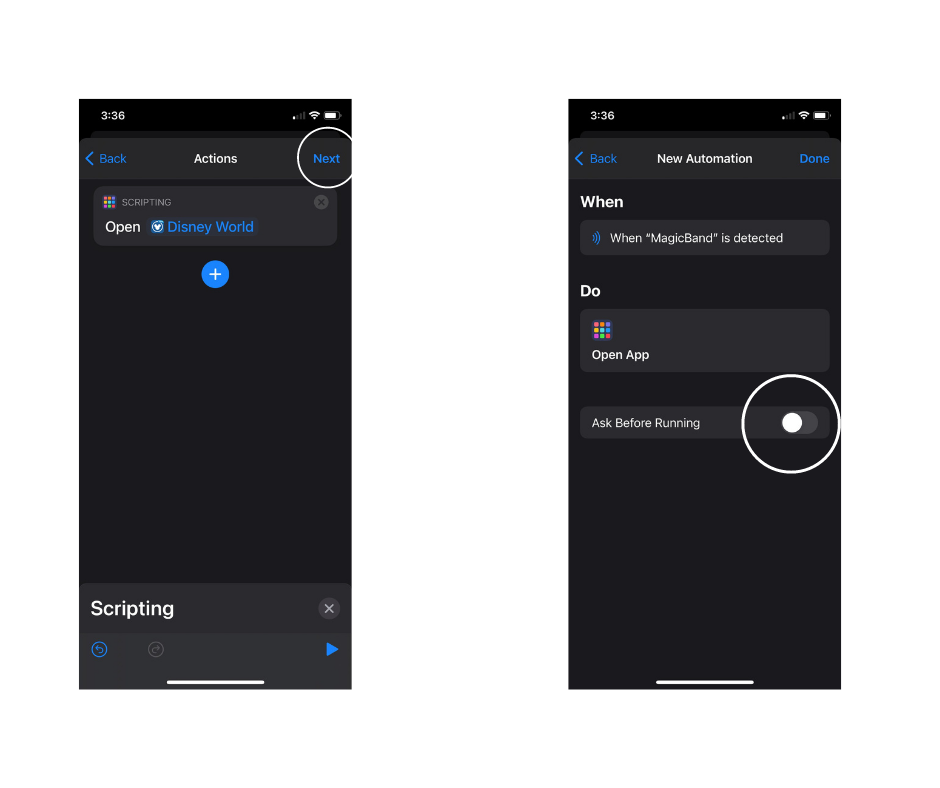

You’ll then see “Disney World” where the word “Chose” used to be. Click “Next” and it will display the automation that you created. For this particular automation I highly recommend turning OFF the “Ask Before Running” feature. This way it’s a more seamless action when you tap your MagicBand.
After that you can close your Shortcuts app and you’ll be free to tap your MagicBand and watch the magic happen!
How To Create Magic By Tapping Your iPhone With Your MagicBand Credit: MickeyBlog
Ready to experience Disney for yourself? There are still many magical packages available for 2020 AND 2021! Fill out our form below for your FREE, no-obligation quote with an Authorized Disney Vacation Planner with MickeyTravels!
Do you want more help planning your next Disney vacation? As an Authorized Disney Vacation Planner, my goal is to help you plan the Magic your way. I also create customized itineraries, book advanced dining reservations, monitor for discounts for your vacation, and much much more! Also, did I mention that my services are FREE? Get in touch toll-free at 1-800-454-4501, via email at SPhillips@MickeyTravels.com or follow me on Facebook!


