Celebrate The Magic of Iceland With This ‘Adventures At Home Kit’ By Disney
Lets face it. Most of us have put our 2020 travel plans on hold and our setting our sights on doings something extra special next year. Bu that doesn’t mean having to miss out on some Adventures by Disney fun. If you were following along with us here at MickeyBlog yesterday you know that Adventures By Disney had to put the breaks on the tours to Iceland for this year but they are absolutely making it up to us with an Iceland at home kit.
Wondering what that means? Let’s take a look!


1. Discover the Land of Fire and Ice
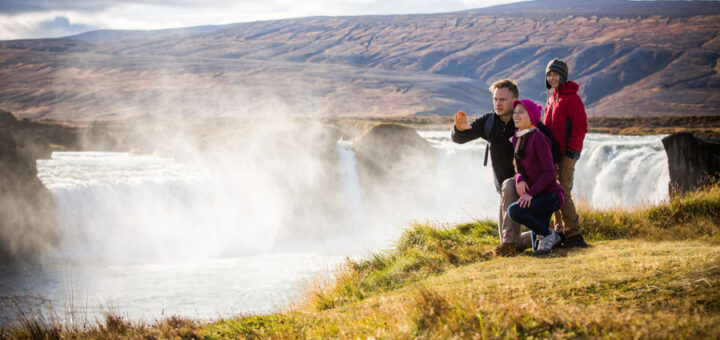
There is so much beauty to be found in Iceland that something magical is happening practically everywhere you look! You’ll find majestic waterfalls, otherworldly valleys, monumental glaciers, stunning volcanoes and so much more! Sady, we can’t be there just not to check out the breathtaking sights but Adventures By Disney is giving us a taste in this awesome video
2. Nordic Fun
One of the most incredible aspects of going on an Adventures By Disney getaway is that you have two amazing adventure guides that work exclusively with your touring group during the visit. Their attention to detail is impeccable along with the big dose of magical Disney customer service. They also are known for having a fun and engaging came or two up their sleeves to keep guests entertained. A great case in point is this guessing game with an Icelandic twist!
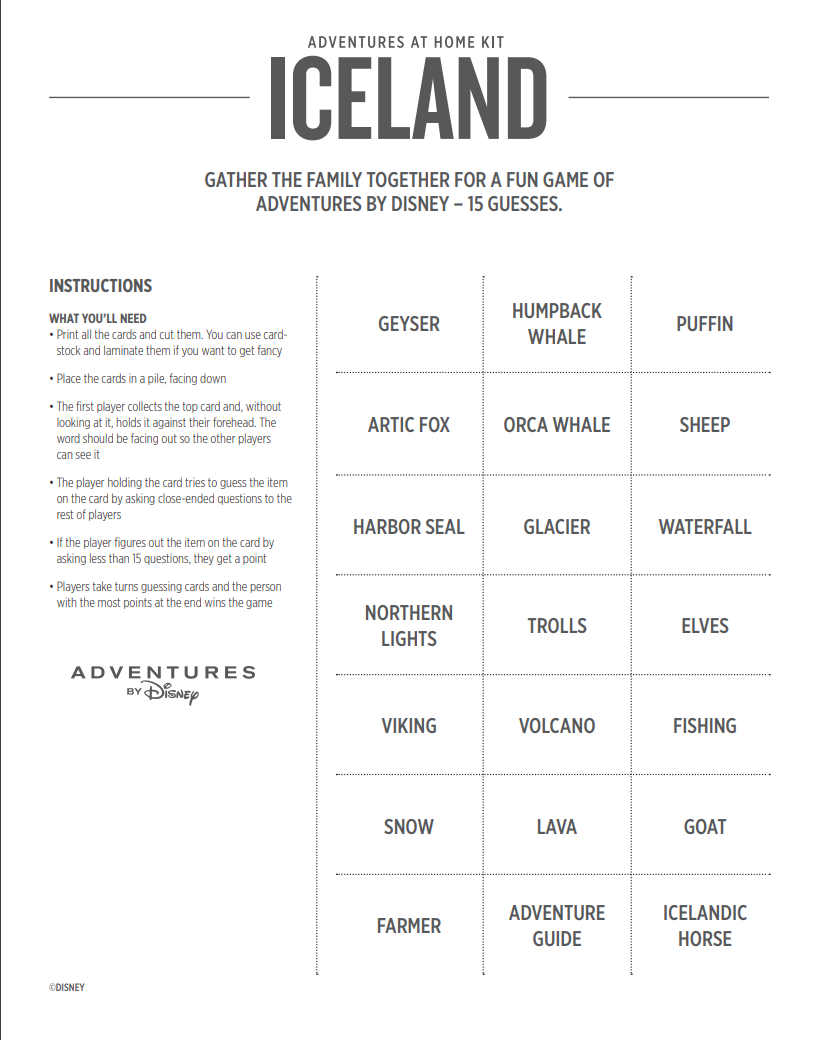

You can download the instruction sheet here.- Iceland – 15 Guesses
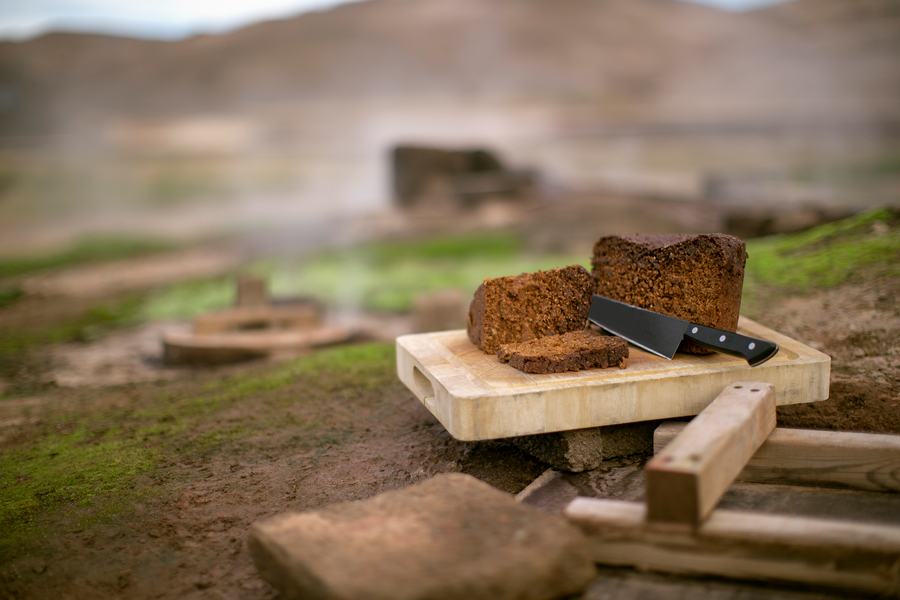

3. Geyser Bread!
With all of this awesome adventuring its easy to work up an appetite. That’s why we here at MickeyBlog thought we’d share with you not one by two incredible recipes inspired by Icelandic culture.
Let’s start with this traditional Geyser Bread recipe. Iceland’s unique rúgbrauð is a dark rye bread cooked by placing the dough into covered pots and burying them near geothermal springs. The steam from the springs does the baking and the result is a dense, almost cake-like loaf of bread that tastes a bit like caramel. We know most of us don’t have a geothermal spring handy but one of our Icelandic Adventure Guides shared a hack to make this delicious doughy goodness at home.
Ingredients:
- 1 Cup rye flour
- 1/3 Cup whole wheat flour
- 1 Tsp baking powder
- ½ Tsp baking soda
- 1 ¼ Cups of buttermilk
- 5 Tbsp golden syrup
- A pinch of salt
Instructions:
- Preheat the oven to 350 degrees F, and line and grease a 1 Lb loaf pan
- Mix all the ingredients with a spoon until you reach a similar consistency to oatmeal
- Pour mix into a loaf pan and cover loosely with foil (the dough will rise so give the foil a dome shape)
- Place in the oven and lower the heat to 225 degrees F
- Bake for 7 hours
- Remove from the oven and cool
Here’s a printable of the recipe- Geyser Bread

4. Icelandic Legends!
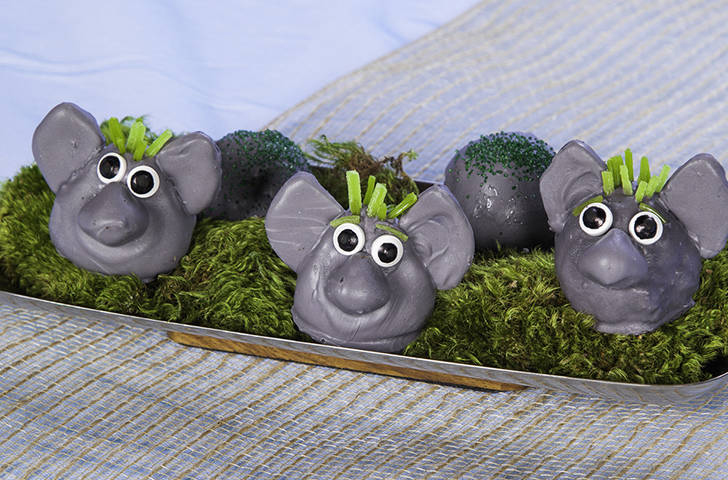
Iceland has a rich history of folklore and legends. One such myth regards trolls, elves and hidden people that inhabit the majestic and mysterious landscapes of this Nordic island. To pay homage here’s a recipe for a delicious treat inspired by the magical stone trolls from Frozen. (Fun fact: Iceland influenced the visual design and the story of Frozen 2.)
Ingredients
- Chocolate cake
- Mixing bowl
- Cream cheese
- Parchment paper
- Sheet pan
- Chocolate chewy candies
- Heatproof bowl
- White chocolate
- Black chocolate “dipping wafers” or “candy melts”
- Green Easter basket candy “grass” or green licorice pieces
- Dark chocolate
- Sandwich bag
- Individual paper or foil candy cups (optional)
- Candy eyes (optional)
Helpful Tip
Quick Tip: For slightly sweeter truffles, substitute cream-cheese icing for the softened cream cheese. Stir a small portion of your crumbs into the grey dipping chocolate, if you wish, to give the trolls a suitably “pebbled” complexion. As an alternative to cake crumbs, you can make cookie crumbs by pulsing chocolate wafer cookies or sandwich cookies in your food processor.
Directions
- Prepare your favorite chocolate cake, either mix or scratch-baked, ahead of time in a 9-inch by 13-inch pan. Once it has cooled, break it into pieces and then crumble the pieces into a mixing bowl to make fine crumbs. This is a very kid-friendly step, if you’re focused more on fun than time-efficiency.
- Soften a cup of cream cheese in your microwave, until it’s easily spreadable but not melted. Spoon it into the bowl of cake crumbs, and combine them thoroughly. A stand mixer with a paddle attachment will do this in mere moments. Small helpers can do it by hand in 15 to 20 minutes, and enjoy it immensely. The finished mixture should feel like soft dough, and hold together when you shape it into a ball.
- Scoop the mixture into rough balls about the size of a golf ball, then roll the balls between your palms to shape them into spheres. Use your fingers to shape the sphere into a pear shape, to mimic the top of the trolls’ cone-shaped head. You should have 15 to 20 cake truffles, depending on their size. Arrange the cake balls on a parchment-lined sheet pan and refrigerate for about 2 hours until chilled.
- Unwrap several chocolate chewy candies, and warm them for a few seconds in your microwave to soften them slightly. Use a small, sharp knife to cut slices from the candies. Squeeze these flat and shape them in to the trolls’ slightly pointed ears. Knead additional pieces of candy into small pear shapes to make troll noses. Set aside.
- Fill a heatproof bowl or measuring cup with white chocolate melting wafers or finely chopped regular white chocolate. Microwave it in 15-second increments, stirring every time, until it’s mostly melted. Take it out of the microwave, and add several black-tinted melting wafers – available at craft stores, or the baking section of many supermarkets – and stir it until it melts. This should give you a pale troll-grey chocolate for dipping. If necessary, add more of the black-tinted chocolate, a half-wafer at a time, and stir until it’s well mixed. You might need to warm the white chocolate again in your microwave. Tip: If the melted chocolate begins to separate, stir in a teaspoon of vegetable shortening to smooth it out.
- Take the candy ears and noses you made previously, and dip each one into the grey chocolate, stick a toothpick into the back of each piece to make dipping easier. Lay dipped pieces on a baking sheet lined with parchment paper. Chill for a few minutes until set.
- Take your chilled truffles out of the fridge. Gently lower the first into your bowl of grey chocolate, on the tines of a fork. Once it’s completely covered, lift the truffle from the chocolate and hold it in place a moment so the excess can drip off. Gently draw the bottom of the fork across the edge of your bowl to remove a bit more chocolate.
- When the grey chocolate has slightly hardened, but still soft, attach ears and a nose to each one. Press a smaller pinch of green grass or candy between the ears, for troll hair. An adult should do the dipping, but kids can take charge of placing the candy grass.
- Optional: Place a pinch of green Easter-basket grass candy on the baking sheet, to make a troll collar, and set the still-wet truffle on top of it.Return the truffles to your refrigerator for another 30 minutes, until the chocolate coating has set and is firm to the touch.
- Optional: You can also roll a truffle ball in ½ inch pieces of edible grass for a more textured look, to mimic their compact shape when the trolls get rolling around.
- Melt a small quantity of dark chocolate, or chocolate chips, in your microwave. Pour it into a sandwich bag, and cut a tiny hole in one corner of the bag. Pipe chocolate through the hole to make dots on each truffle, for the eyes. Place each individual troll in its own candy-paper cup, if you wish, or simply serve them on a platter.
- Optional: Skip the chocolate and attach little candy eyes to each truffle.


Let’s Get Planning!
If all of these fun activities have piqued your interest in treating your family to an Icelandic adventure of a lifetime with Adventures By Disney then we here at MickeyBlog can help! Disney’s international touring company currently offers an 8 day touring package to Iceland that includes resort stays, 17 meals and access to over 28 incredible sights. You’ll be able to revel in the unparalleled natural beauty of Iceland as you explore its dramatic landscapes that feature majestic waterfalls, lunar-like valleys, mountainous glaciers and stunning volcanoes. You’ll also savor culinary flavors and take part in the local traditions of this vibrant Nordic island. And be sure to keep an eye out for Yule Lads!
Dates For 2021 are as follows:
- May 26, 2021 – Jun 2, 2021 (Adult Exclusive)
- Jun 5, 2021 – Jun 12, 2021
- Jun 16, 2021 – Jun 23, 2021
- Jun 26, 2021 – Jul 3, 2021
- Jul 7, 2021 – Jul 14, 2021
- Jul 17, 2021 – Jul 24, 2021
- Jul 28, 2021 – Aug 4, 2021
- Aug 7, 2021 – Aug 14, 2021
- Aug 18, 2021 – Aug 25, 2021
- Aug 28, 2021 – Sep 4, 2021
- Sep 8, 2021 – Sep 15, 2021 (Adult Exclusive)
- Sep 18, 2021 – Sep 25, 2021 (Adult Exclusive)
- Sep 29, 2021 – Oct 6, 2021 (Adult Exclusive)
If you’re interested in finding out more regarding Adventures By Disney’s incredible getaway package to Iceland simply fill out our form below!
Find articles like this helpful? Then why not consider working with an Authorized Disney Vacation Planner? As an agent with MickeyTravels, I’ll be on hand to assist you with everything from finding your perfect package to helping you plan lots of special touches to make your visit truly magical. Best of all my services are absolutely FREE. Get in touch at 1.800.801.4025 via email at mroden@mickeytravels.com or follow along on Facebook


